Understanding voids and filler panels
Most cabinet installation jobs require the use of filler panels and void spaces. These fillers and voids are normally (but not limited to) between 30mm to 60mm wide. They are typically the same colour and finish as the material used for your cabinet drawers or doors.
When designing your cabinets, you may need to include filler panels and void spaces. Fillers and voids are very helpful in dealing with some of the uncertainties that may arise during installation.
These include corners of your room not being 90 degrees or walls not being exactly square. – resulting in your finished cabinets either fitting tight, or not at all. Void spaces and fillers help to alleviate these problems, resulting in a straight, centred and seamless finish to your cabinets.
Straight line kitchen voids
When measuring the distance between two walls, it is important to take two measurements. Firstly, measure against the wall at the back where your cabinets will sit. Then measure along the line where you will position the front of the cabinets. The picture shows what happens when your wall is not straight, which can lead to issues when installing cabinets. The measurement at the back wall is 3020 mm. The second measurement is 3040 mm. You can see the obvious problem that this may cause.
When using filler panels, installing your cabinets becomes an easy task. The filler panel covers the empty space next to the cabinet. This creates a smooth appearance.

U-shaped kitchen voids
If you are looking for a U-Shape, you have 3 walls to contend with. Place a Corner L Shape cabinet, that has a smaller depth than your other base cabinets, in the corners of your room. This ensures that you have plenty of wiggle room behind to ensure your cabinets fit in your available space.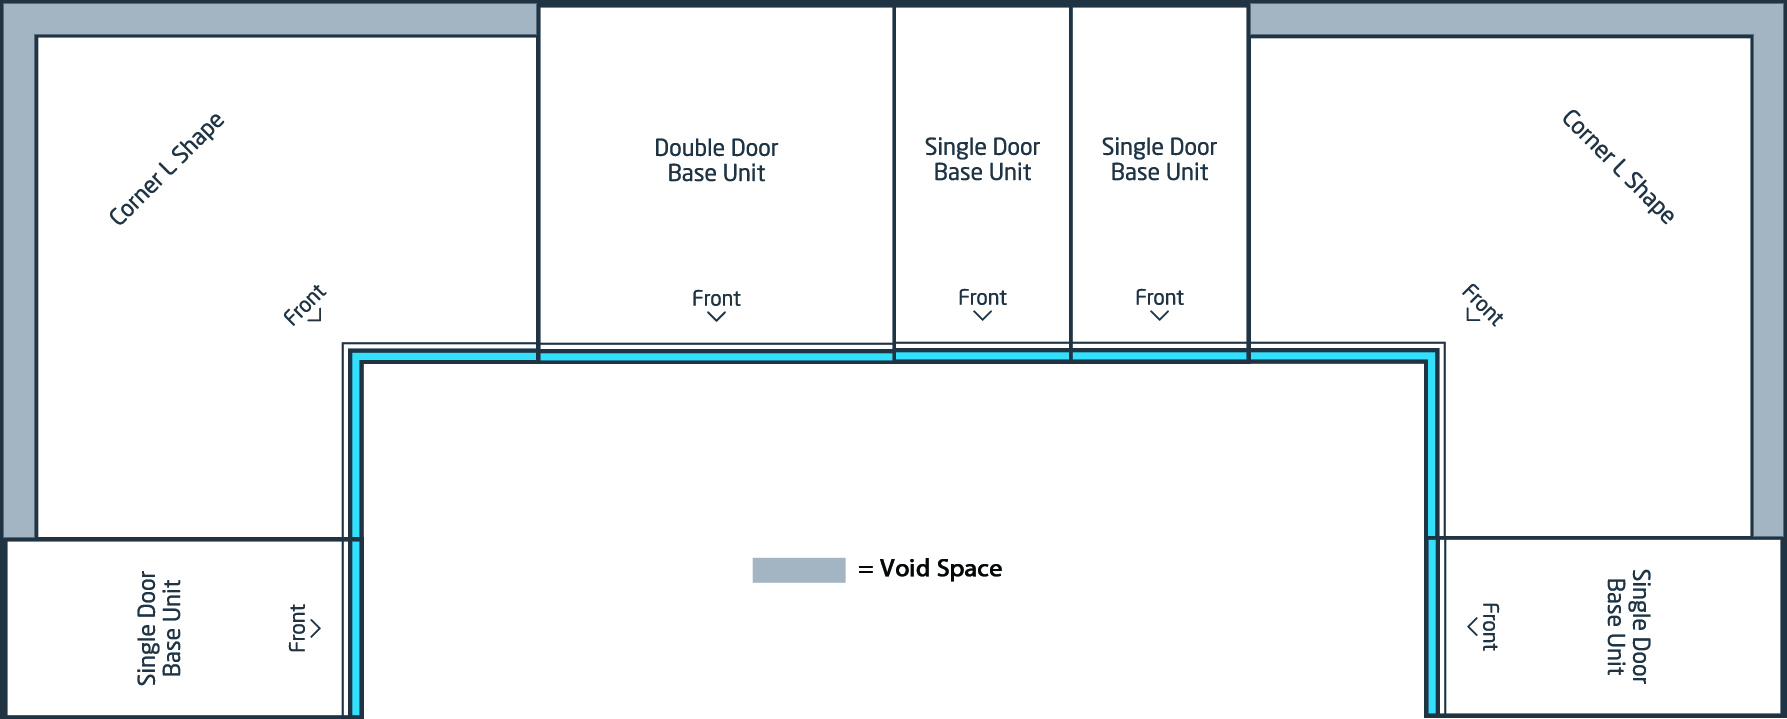
Create a void space by using your Corner L Shape cabinets have a smaller depth than the rest of the cabinets. This hides any variation that the two corner walls may have. Once you install your bench top, it completely hides the void spaces.
Measure the back and front of where the cabinet will be, just like with the straight line kitchen example.
L-shaped kitchen
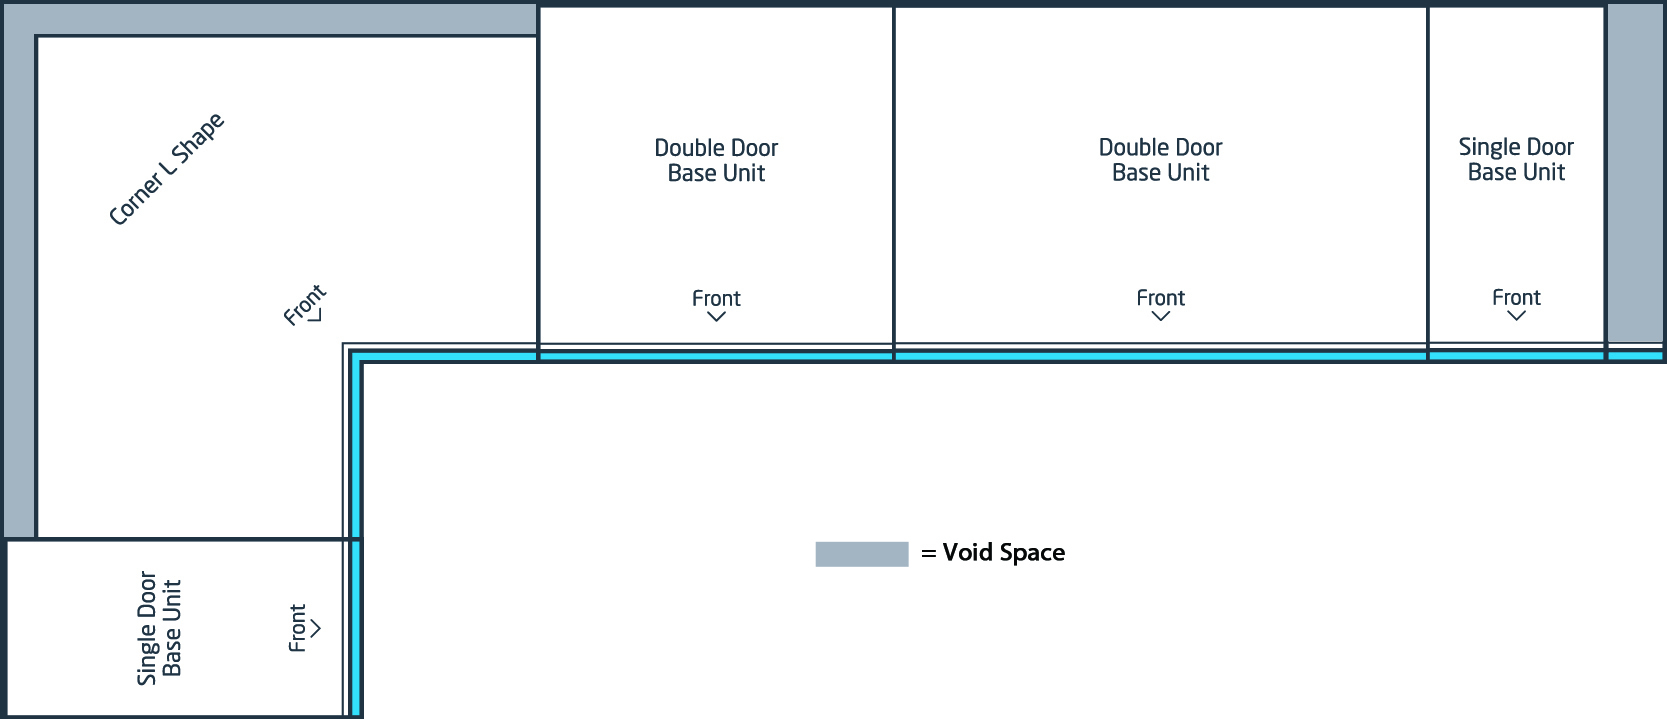
If using this design, use a Corner L Shape cabinet. Make sure it's depth slightly smaller than your other cabinets will allow for a void space to be present.
See the above layout where there is a Corner L Shape cabinet with a void space behind it. There is also a filler panel on the right end of the kitchen. This will finish the run of cabinets against the wall. The two void spaces on either side of your cabinet run gives you enough room to correct inaccuracies.
Blind returned unit
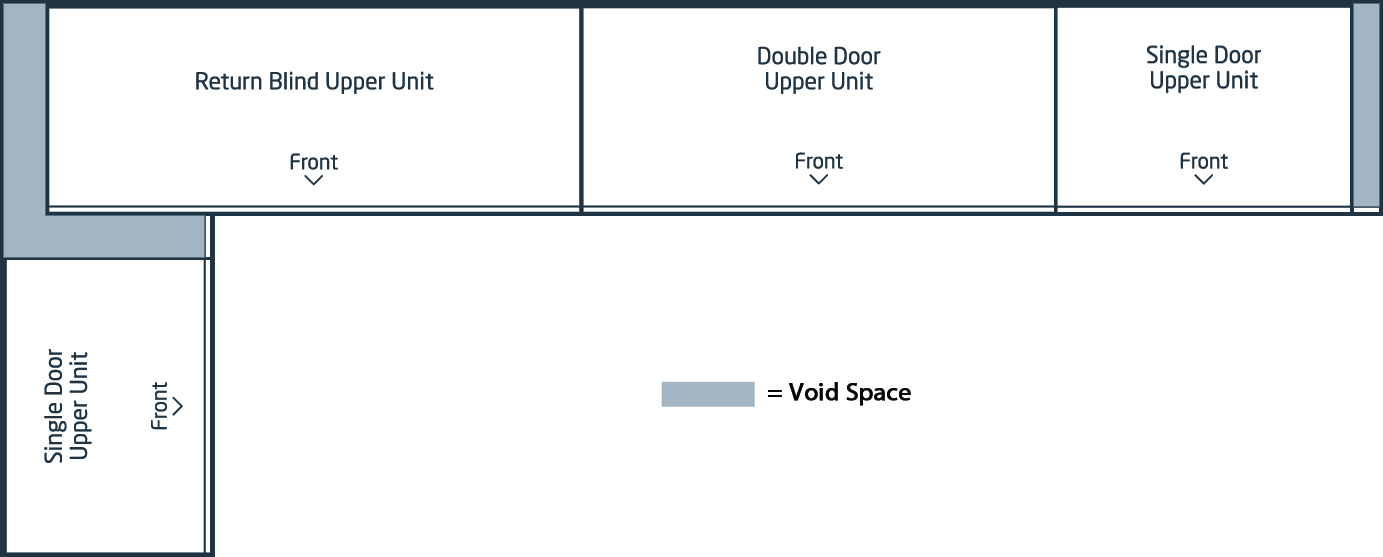
You can also use Blind Return cabinets in the corner of a room. In the example above, there is a filler panel between the Returned Blind Upper cabinet and the Single Door Upper cabinet. This hides any void space between the two cabinets and gives ample room to line up the remaining cabinets.
Filler panels, and doors & drawers
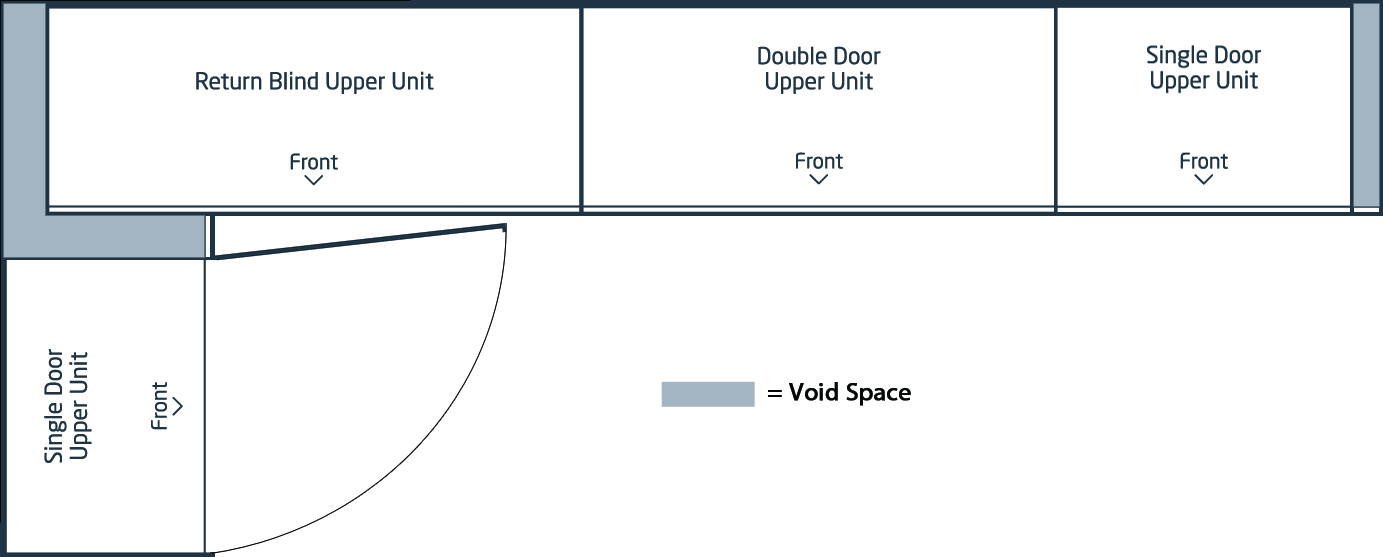
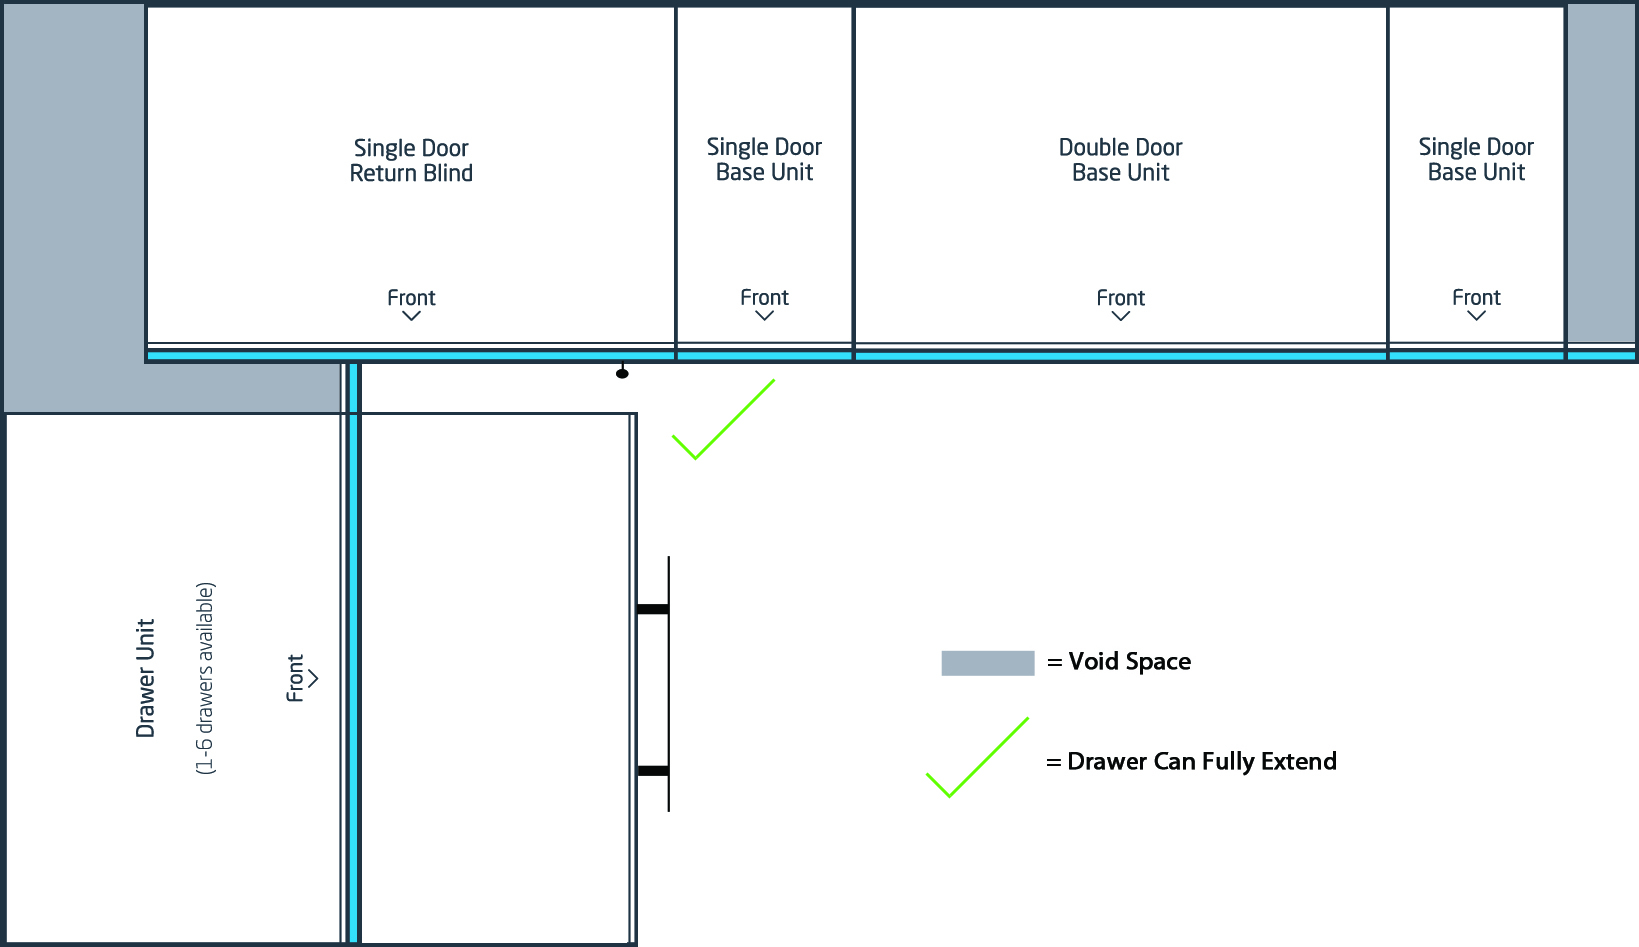
Use filler panels in your kitchen when using a Return Blind cabinet. This will allow your doors and drawers to open fully.
In the above layout, the single door upper cabinet has no restriction of door movement. This is because of the filler panel and void space.
In the example below, the drawers on the Base Cabinet cannot fully extend. When open, they hit the door handle of the Single Door Return Blind cabinet.
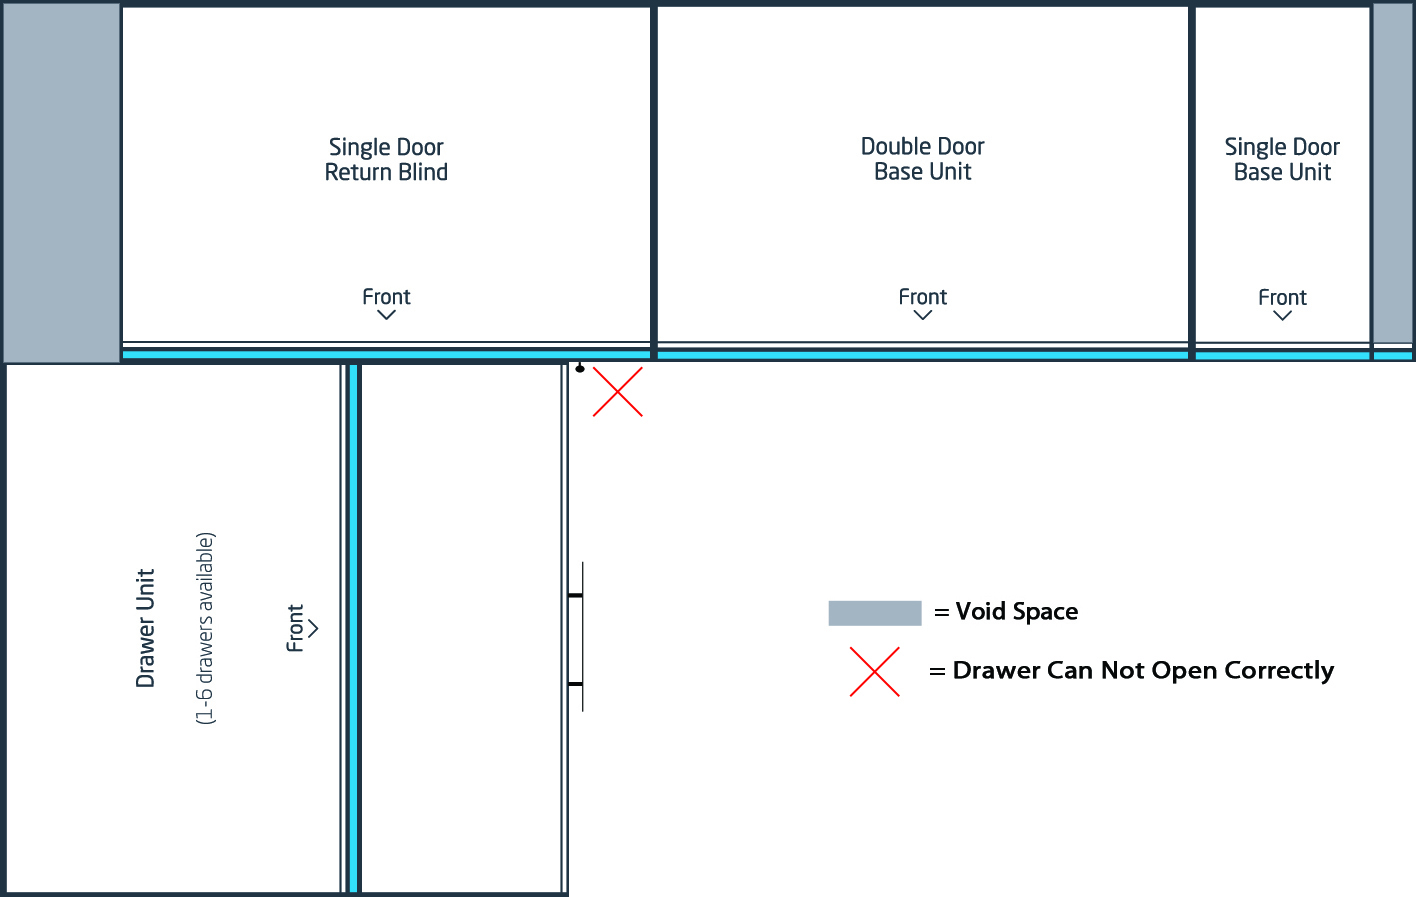
In the example below, there is a filler panel with void space. This allows for the drawer to fully extend and give maximum access to drawer space.
