Behind the scenes, we have been working hard to bring in some new changes to goCabinets and we are pleased to announce that these updates have been completed and are ready for you to enjoy.
Initially it may appear pretty different to what you are used to, but never fear, all the things you love about goCabinets are still all there, just shuffled around to make more sense and to be easier on the eye! The new design features a clearer, more free-flowing process of adding in cabinets, with the advent of lots of help buttons to assist you through your order.
Furthermore, we have been doing some work on speeding up the loading time of pages, so you can quote and order your products even quicker!
Below are some examples of how the new goCabinets looks, including your new ‘Dashboard’ which is your reference point for accessing all current and completed jobs as well as news & updates, as well as look at the new Room Defaults process.
“Initially it may appear pretty different to what you are used to, but never fear, all the things you love about goCabinets are still all there”
goCabinets ‘Dashboard’ – your new home page
This is your home page where you can create new jobs, continue working on current jobs and see the status of all submitted jobs. Any goCabinets news, as well as any updates from your manufacturer are displayed down the right side of your dashboard. You now also have the ability to quick access jobs from the drop down menu along the top banner.

Room Defaults
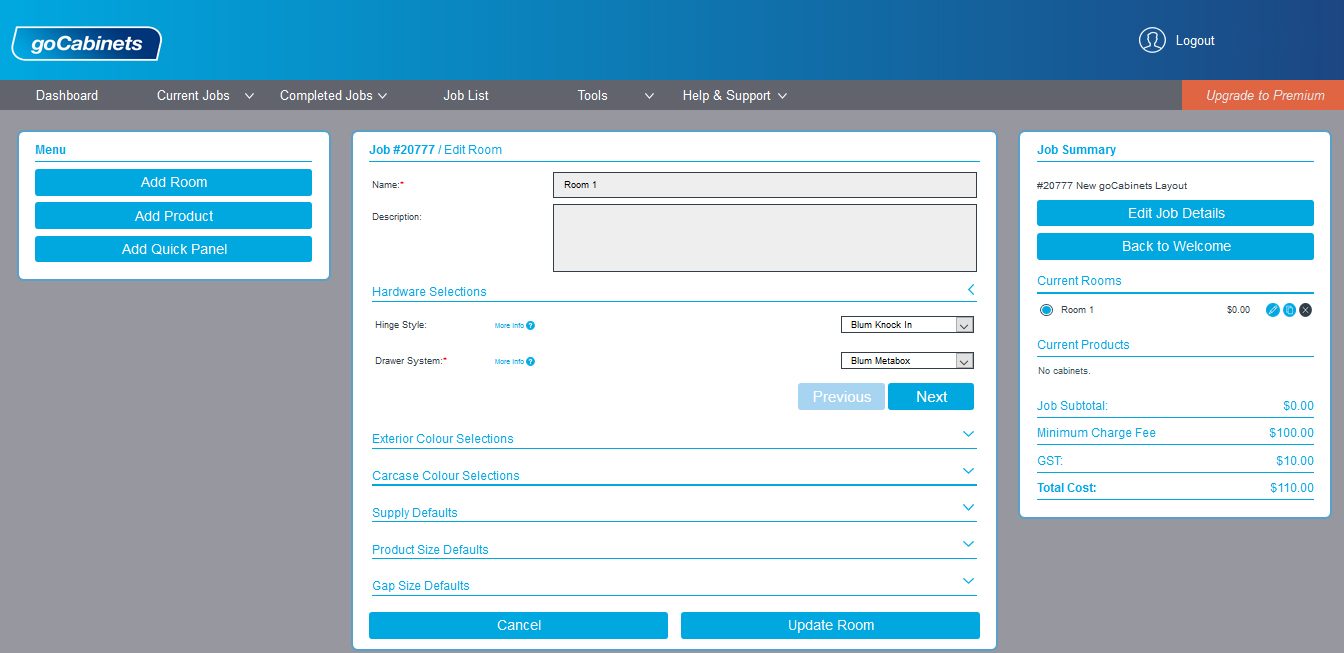
A new layout sees the process of setting room defaults become an easier step-by-step process. Simply click ‘Next’ after completing each section, which will collapse the information you have just entered and show only the selections available to you in the next section.
This is particularly good for new users, reducing the clutter and confusion of seeing all your room defaults at one time, and enabling each section to be worked through methodically.
If you are happy with your global room defaults you have set up under “Tools>Settings”, you can simply skip each of these steps by clicking ‘Save Room’ to move onto adding products.
Adding Cabinets
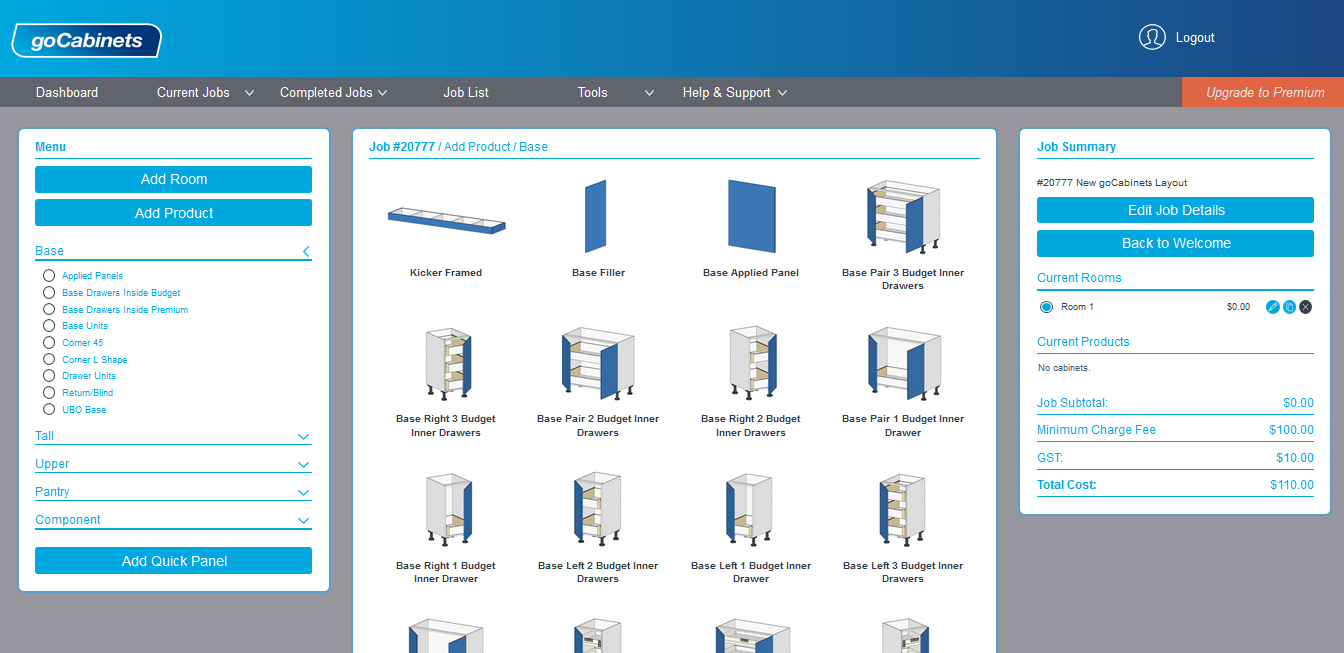
Once you have set up your room default, it is time to add in your products. The process of adding cabinets to a Room has now become simpler thanks to the implementation of a quick filter sort on the left-hand side of your screen.
After you have selected ‘Add Product’, the entire goCabinets catalogue will display in the middle of your screen. To make things easier, you are given the option to sort using the categories and sub-categories on the left-hand side, which appear after you click Add a Product.
Entering Cabinet Specifications
The process of entering your cabinet specifications has not changed, however does look a bit different.
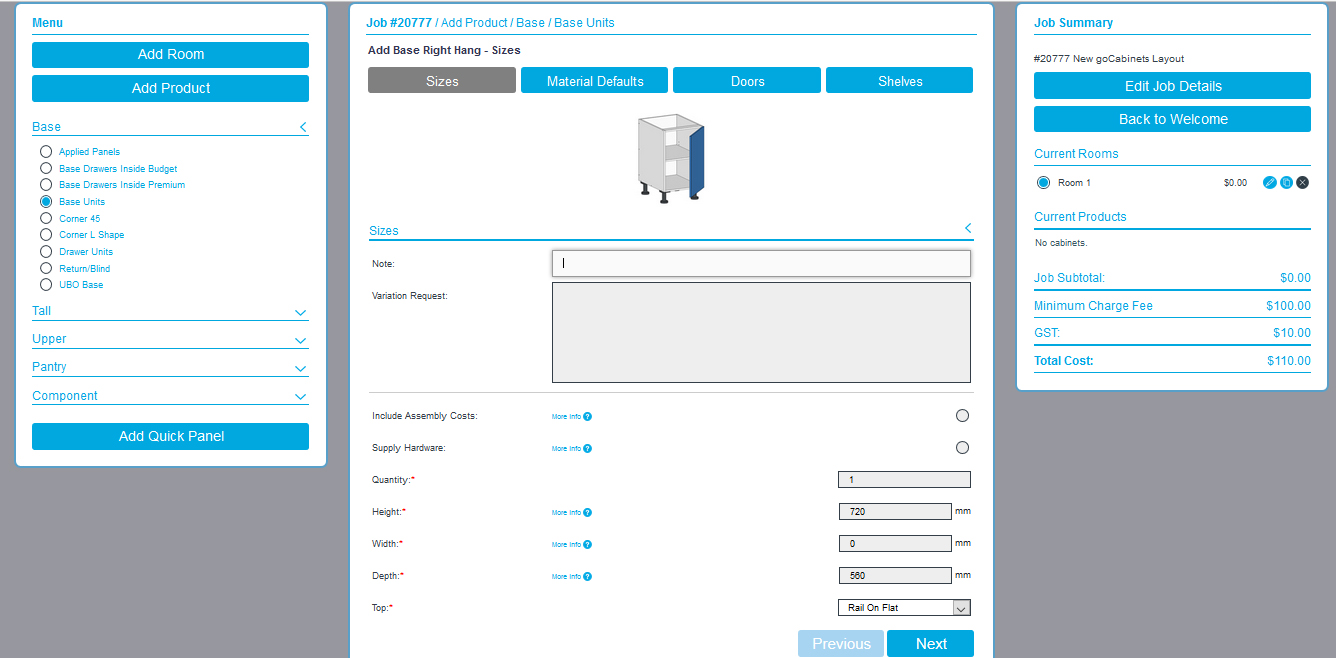
Firstly, you now see an image of the cabinet/product that you are ordering while you are entering your specifications and choosing materials and hardware.
Secondly, like setting up Room Defaults, working through the sections of adding in specifications is much more methodical. Each section is collapses when not in use, so that you only see the information relevant to the section that you are working on at that particular time. Simply click Next or click on the tabs along the top of the middle panel to change the information that is being displayed.
